September 28, 2011. CCA Katipunan.
Call me maarte, i dont care, but i don't really like trussing raw chicken. What's to like? Pasty skin? check. random parts with feathers? check. blood here and there? check. neck longer than the normal that you need to chop it yourself? check.
what's to like? i like it only if it's cooked and i'm betting majority of the world agrees with this.
yes. this is the part where you chop the extra neck!
remove excess skin, fat, internal parts tucked wayyyy inside.
See the torn skins on the chicken? *vomit*
Well, gotta do what ya gotta do.
So using a standard twine, you make sure that the drumsticks or chicken legs are tied one on top of the other,
like crosslegging it or something.
You need to make sure that you push the twine until the farthest part of the leg part. for the even cooking and because we don't want our chicken to have the twine marks when being served.
Now, we tuck the wings behind the chicken. Imagine relaxing on a poolside chair resting both your hands at the back of your head. That's exactly what you need to do here. Grossed out yet? After tying the drumsticks, just grab the twine and pull it up to the *gross* neck part making sure that the wings are tucked in before tying the knot.
All done!
Now, this is just to compare a trussed chicken and a more relaxed one.
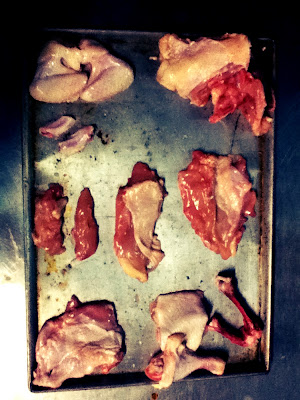
Exhibit A
So after learning how to truss a chicken, we discussed chicken parts and how and where to chop them. Parts and bones, referring to exhibit A, we have there, leg part, thigh part, deboned, tenderloin, breast, butterly, wings, wingtip, ribs, and carcass. There. That just about covered the entire tray.
We sent back the chicken to Oceana after this class for tomorrow's use.
Cheers! Until the next! :)


No comments:
Post a Comment